Introduction
Welcome to the Playable Concepts tutorial series on making tiny games using Construct 3 by Scirra Ltd. This tutorial series will teach you how to quickly and easily develop and use tiny games as part of your teaching. This first tutorial provides a comprehensive, step-by-step instruction on how to make a simple dodging game using the game engine Construct 3.
If you prefer, you can download the tutorial as PDF:
Why Construct 3?
The Playable Concepts project team has reviewed various game-making tools and noticed Construct 3 is one of the tools that provide the easiest and quickest solution for teachers, with the lowest point of entry, and a free trial version that is not limited to a specific time period. You can run the Construct 3-editor in a web browser (no installation required), and it is easy to publish games made with it as HTML5 on both websites and in presentation materials – for example, sharing your game as a direct link with students, or embedding your own games into Keynote presentations. Once you’re familiar with Construct yourself, it’s easy to teach to students as well!
Let’s get to it! The game you will learn to make will look something like this:
Part 1: Getting started with Construct 3
Step 1 – Launch Construct 3
Go to https://editor.construct.net/ and launch the Construct 3 game making tool. We recommend you use the Google Chrome browser, as the Construct 3 tool works better in Chrome than Firefox as of April 2020.
You can start working with the free version of Construct 3, without sign-up or log-in. You can then later create your own account, and buy a subscription to access more advanced features, but all Playable Concepts tutorials only require the free version.
Step 2 – Create your game project
You can work with the free version of the Construct 3 by pressing ‘New Project’:
- Go to Construct 3 website (https://www.construct.net/en/make-games/free-trial) and launch the editor
- Click “New Project”
- Start by choosing a game size. This defines the size of the game screen.
- For a fullscreen game, choose 1080p Landscape
- Name your project
- Press “Create”

For more details on the project settings, visit: https://www.construct.net/en/make-games/manuals/construct-3/overview/start-page
Overview of the Construct 3 interface
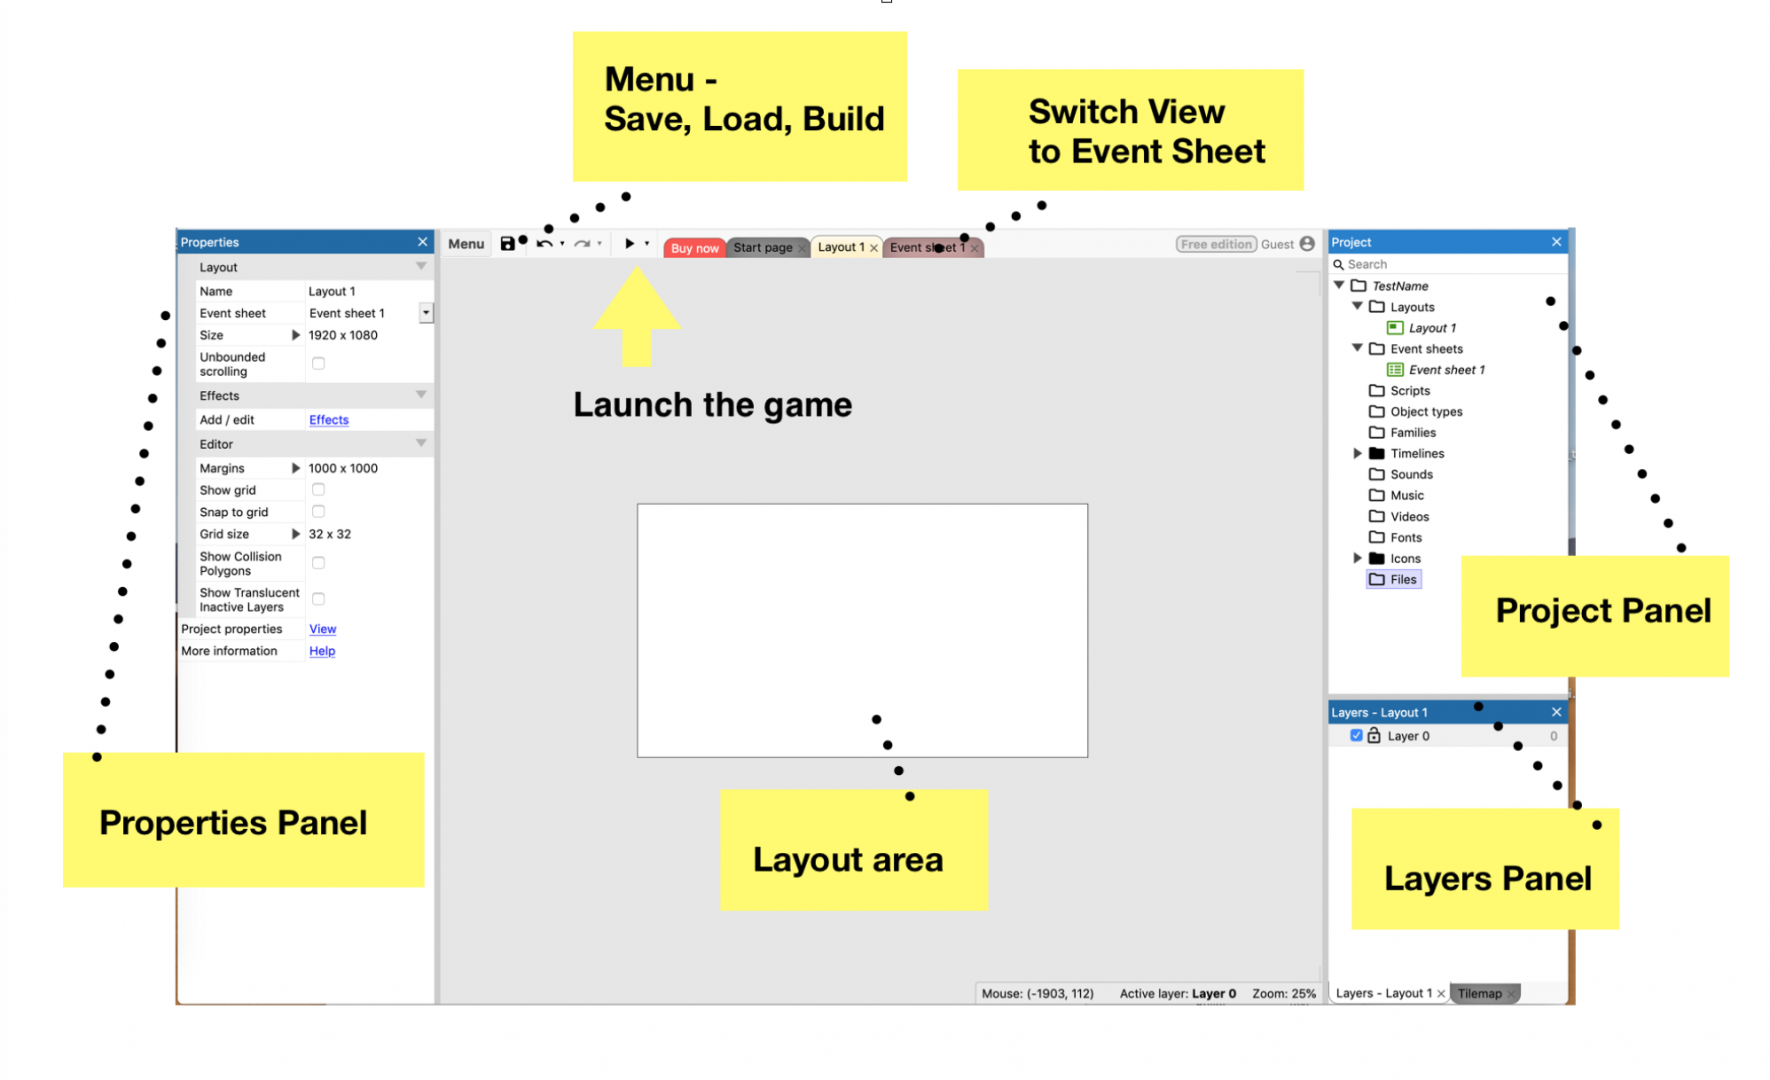
For more information on the Construct 3 interface, visit: https://www.construct.net/en/make-games/manuals/construct-3/interface/layout-view
Part 2: Making the game
A few notes before we begin:
- Remember, you can always hit CTRL+Z (Mac: cmd + Z) if something goes wrong. Construct 3 allows two Undo’s.
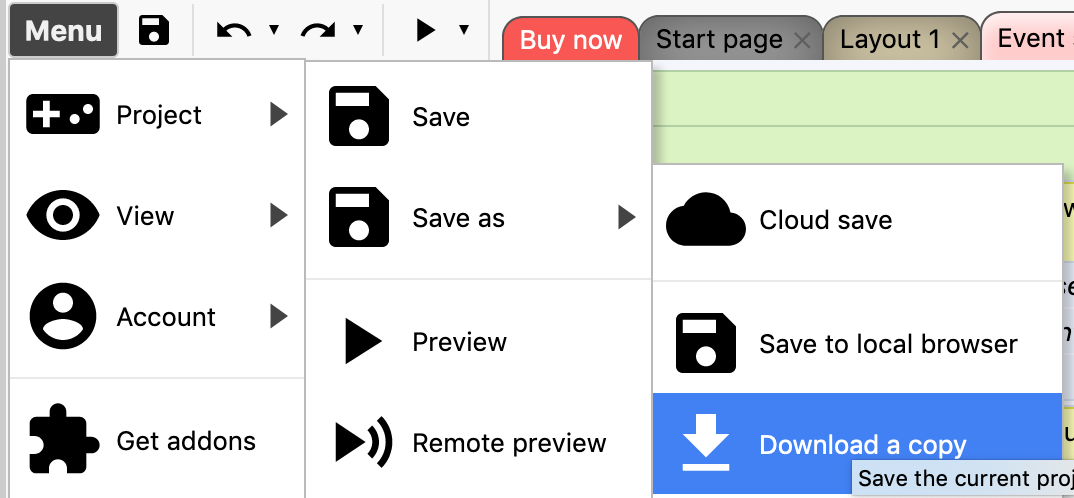
- We recommend making saves during the process, just in case. Click Menu > Project > Save as > ‘Download a copy’ to make a local save on your computer. This is a save of the .c3p-file.
Let’s start making the game!
Step 1 – Adding a Player object:
First, let’s add a player character. To do so, we have to add an object of the type “Sprite”:
- Right-click (Mac: Ctrl + click) anywhere on the white Layout-area.
- Click “Insert new object”
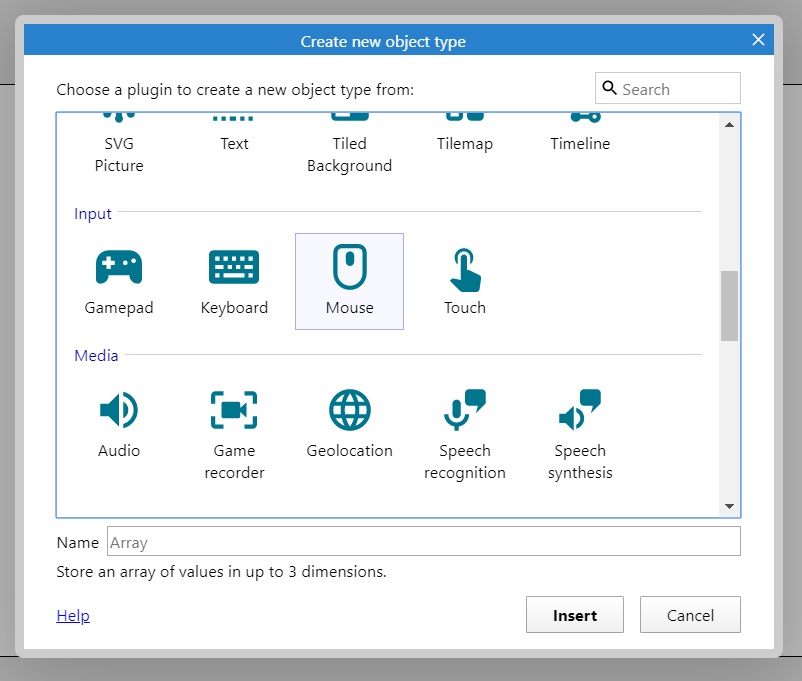
- In the menu, scroll until you find the space invader-icon “Sprite” and click it to activate it, and then click “Insert“.
- Crosshairs should now appear on your cursor. Choose a location on the Layout, and click.
Editing the Player sprite:
A Sprite, in the world of computer games, is an image that is shown on screen, either unmoving or animated. When you add a new object of the type “Sprite”, the Construct Animations Editor window automatically opens:
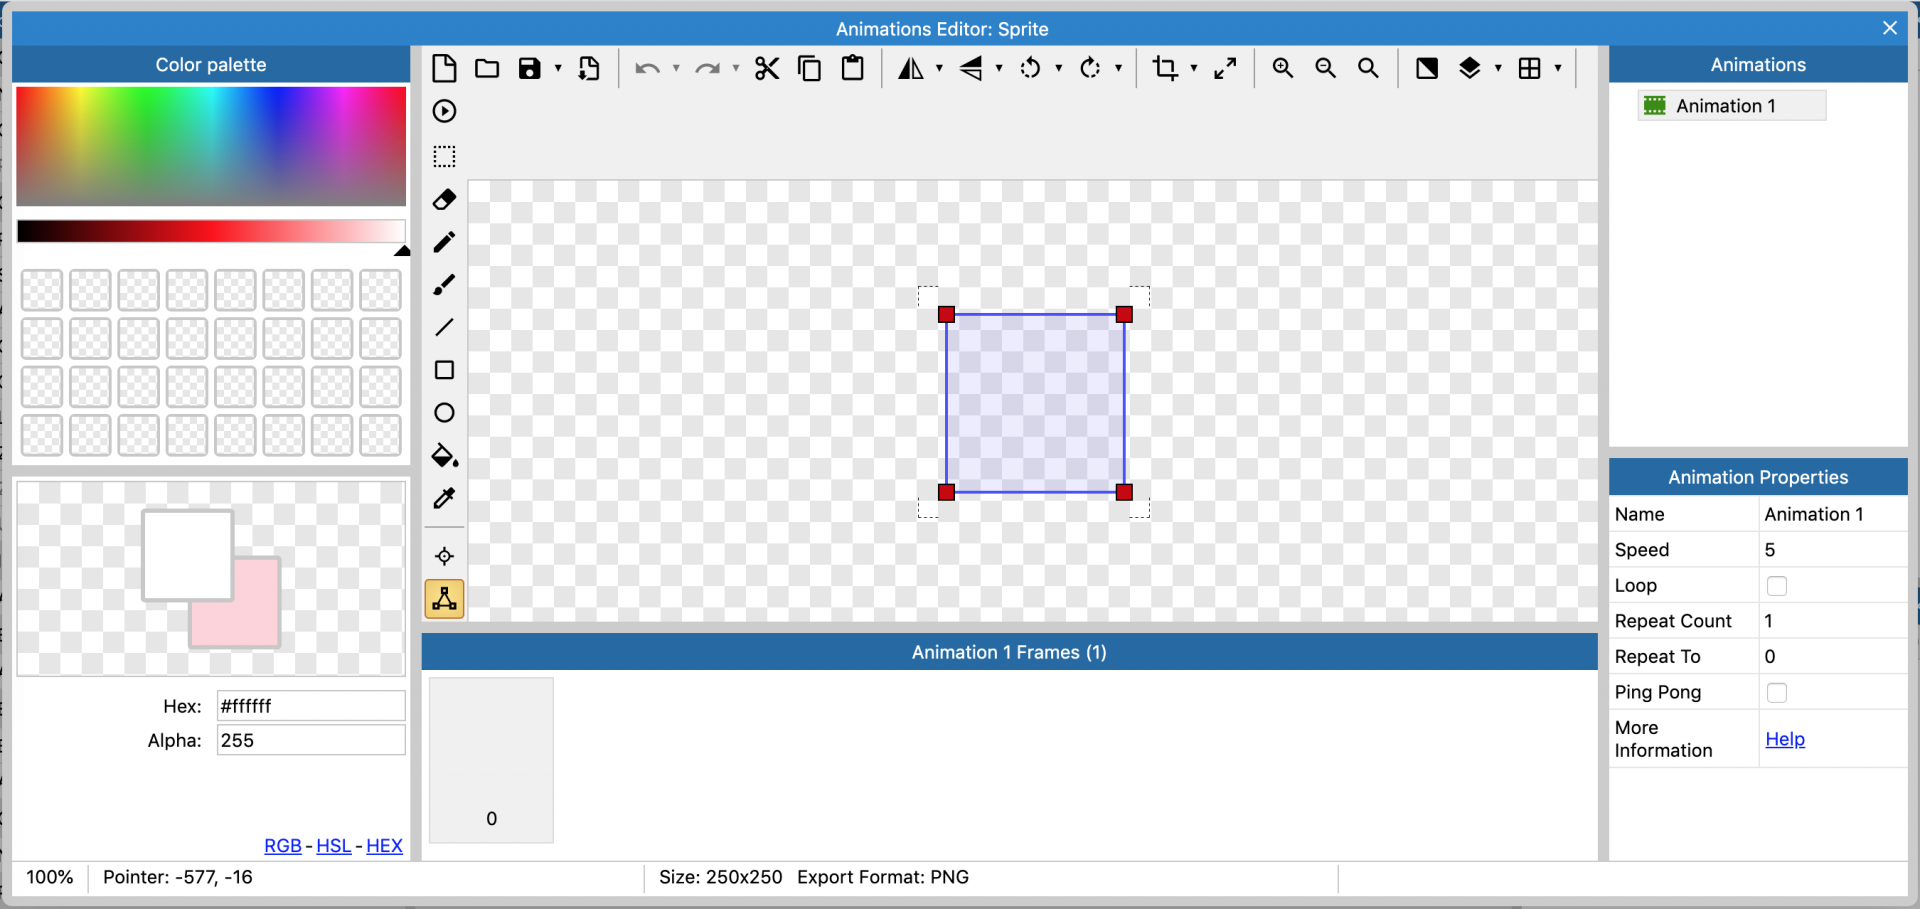
Now, you can make the “Sprite” whatever image that you want to use as a Player character:
- Option 1: Directly draw the character in the editor. The editor works similarly to MS Paint, complete with brushes, colours and eraser. If you make mistakes, CTRL+Z is there for you.
- Note: For more on the Animations Editor, see Tutorial 3: Part 1: https://playableconcepts.aalto.fi/tutorials/tutorial-3/part-1-animations-editor/
- Option 2: Import an image from your computer by clicking the folder icon. Check out our Game Art Assets library for free to use images.
Scale by dragging corners.
If you want to use the same images as the one used in this tutorial, you can go ahead and right-click on them below here to save them to your computer, and load them into the game:


For now, our Player will be a static image. It will be moved by code.
- You can also add frames for animation at the bottom of the editor.
- For more on animations in Construct 3, see Tutorial 3: Part 3 https://playableconcepts.aalto.fi/tutorials/tutorial-3/part-3-animations-in-construct-3/
When you’re done, close the sprite editor window by clicking the corner “X” button.
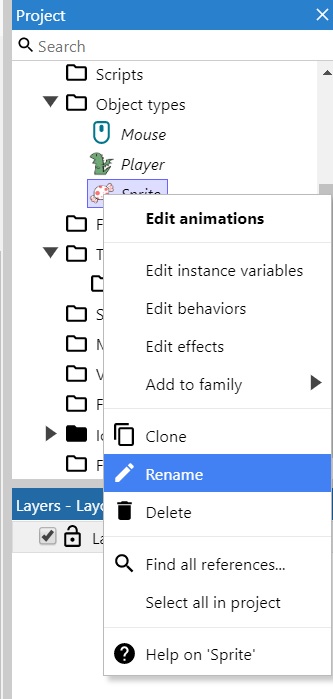
- You can change the name of the object in the Object’s properties menu to make it easier to remember what object is what.
- Try to test the game by clicking the Play button at the top menu. Nothing happens – In Step 2 we will add interactivity!
More information on the Animations Editor is available at the Construct 3 website:
https://www.construct.net/en/make-games/manuals/construct-3/interface/animations-editor
Step 2 – Making the game interactive
Next, let’s make something interactive!
Adding an input
Our game will work with mouse input. For the mouse to work, we need to tell Construct 3 to listen to the mouse location and clicks. Let’s add that:
- Right-click (Mac: Ctrl + click) anywhere on the white Layout.
- Click “Insert new object”
- In the menu, scroll until you find “Mouse” under Input, click it to activate it, and click “Insert“.
Making the player move
In Construct 3, code happens in the Event Sheet. Go to the “Event Sheet” page by clicking Event Sheet in the menu bar on top.
- Click “Add Event” > choose “System” > “Every tick”. This will be the event’s Condition, and it defines when something is supposed to happen.
- Click “Add Action” > player object > “Set position” >
Then write X: 300, Y: Mouse.Y . This will be the event’s Action, and it defines what is supposed to happen when the event’s conditions are met. - Try to test the game by clicking the Play button at the top menu. The player object should be moving up and down accordingly.

Adding enemies to avoid
First, let’s create an enemy character and make it move. We’ll start just like we started with the Player character:
- Create a new object by right-click on the layout > “Insert new object” > “Sprite”
- Choose to draw a sprite, or load one from your computer
- You can change the name of the object at the Object type properties menu:
Adding behaviours
Now let’s next add behaviours to the enemy character. Behaviours are ready-made scripts. In this tutorial, we will make the enemy object move towards the player.
- Right-click on your enemy object > “Add” > “Behavior” > Choose Movement “Bullet” and press Add – this makes the enemy object start to move straight towards a certain direction
- Repeat this once again: Right-click on your enemy character > “Add” > “Behavior” > but then in this time, choose “Destroy Outside Layout” — this makes the enemy character to go away once it reaches the end of the screen.
- Left-click the player object at the layout > At the left side of the screen, you can find “Behaviors” section and there with “Bullet” > There, change “Speed” as -300.
Test your game and drag the enemy object into a good starting position so that it hits the player.
Detecting collisions:
Next, let’s code some more. We will make it so that when the player character bump (collision) with the enemy, the enemy then gets defeated (destroy):
- Go to Event Sheet, and click “Add event”:
- Condition: Click the enemy object > Double-click “On collision with another object” > Click “click to choose” button and select the player object.
- Action: Click “Add action” next to the event “(enemy) on collision with (player)” > Select enemy object > “Destroy”
Spawning enemies:
Good. But we want more enemies than just one right? Okay, let’s order the system to create one more enemy object in every 1 second. In games, we call this spawning:
- Go to Event Sheet, and click “Add event”.
- Condition: Choose “System” > “Every X Seconds” > In the text field, write ‘1’.
- Action: Click “Add action” next to the event “Every 1 seconds” > choose “System” > “Create Object” > Click “click to choose” button and select the enemy object >
Then write: X:LayoutWidthY:random(1, LayoutHeight)
NB: Take care to write it exactly that way! - If you test the game by hitting that preview play button, now an enemy will be created every second, at somewhere random at the right edge of the screen.
Step 3 – Making a lives system – adding variables
For this game to make sense, we will add a Lives-meter that goes down whenever the player bumps into the enemy object. For this we need to create a variable, a way to store and overwrite information in the game. A variable can be in the form of text (called a String), a truth value true/false (called a Boolean), or a number (called a Number).
In this case the variable we need is a Number since it lets us add or subtract lives:
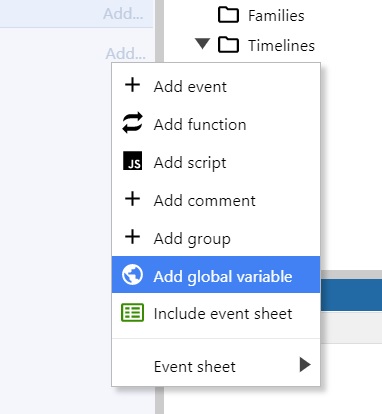
- Go to Event Sheet, and click the “Add…” at the right side edge of the event sheet page, above the actual events.
- At the drop-down menu, click “Add global variable”
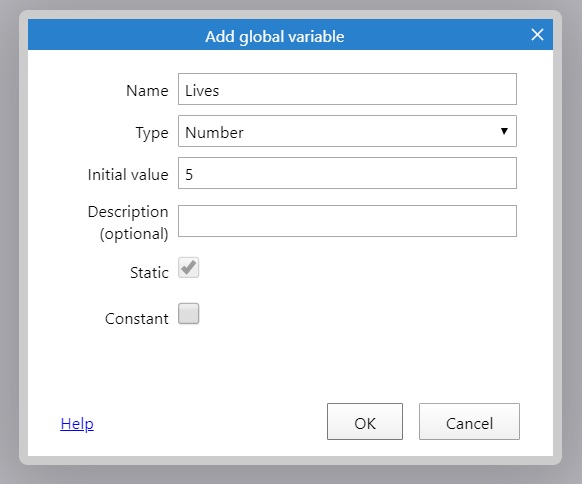
- Name the global variable ‘Lives’ and set its type as ‘Number’. Set the initial value as 5.
We need to add another action to actually be able to change the variable when an enemy is destroyed:
- Find your event with the enemy and “On collision with another object” > Player
- Action: Then click “Add action” next to this new event, and choose “System” > “Subtract from” > Choose the global variable ‘Lives’ and type ‘1’ in the value field > click “Done”.
In order to actually see the lives-variable going down, we have to make a text object to display it.
- Create a new object by right-clicking > “Insert new object” > “Text”
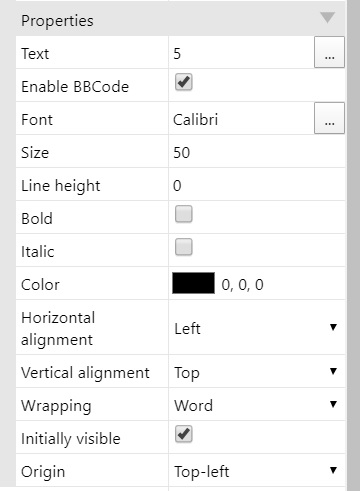
- Place the text object somewhere nicely at the layout, and double-click to edit it it> Write ‘5’ there.
- You can customize the font style and size at the “Properties” menu.
Let’s next add an action that changes the updates the text to display the score:
- Go to Event Sheet and the event “On collision with another object” > Player add another action: “Text” > click “Set text” > type
Lives. - Test the game to see if everything works nicely!
Step 4 – Making game over
If we want it to be game over when life goes below 0, we can create another layout for it – a Game Over screen – and switch to it by adding an event that checks if the variable is 0. Let’s start by adding the Game Over screen. For that we will need another layout:
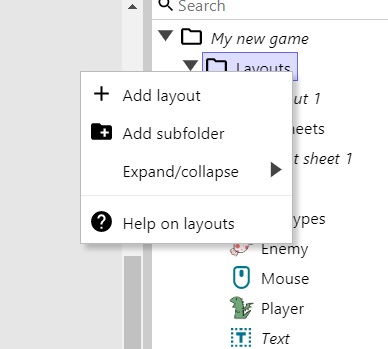
- In the Project panel on the right side of the screen, right-click the “Layouts” folder and choose “Add layout”
Note: You don’t necessarily need to add Event Sheet for this new layout for now.
- Go to Layout 2 by clicking its tab:

- Now add another text object in this Layout 2 by right-clicking > “Insert new object” > “Text” >
- Type ‘Game Over!’ in the new text object.
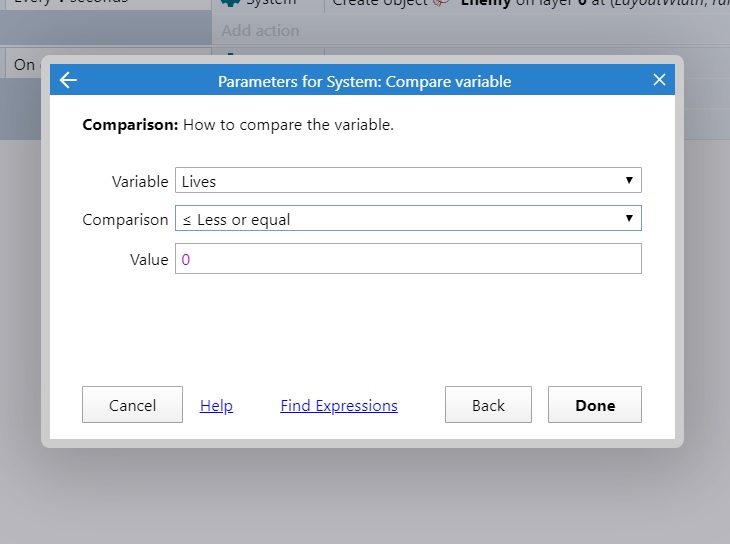
Next, let’s add the event that checks if the player is dead:
- Go to your original Event Sheet by clicking its tab, and click “Add event”
- Condition: Click to choose “System” > “Compare variables” > Set variable as “Lives” and set “Less or equal to” “0”.
- Action: Next to the “System. Variable ≤ 0” > click “Add action” > choose “System” > “Go to layout” > And select ‘Layout 2’
Time to test your full game! Press the preview play button! You should now be able to play the game that looks something like this:
Congratulations on making your game! If you want to, now you can continue developing the game.
Ideas to take your game further:
- Add a Score–variable and text
Try to see if you can add another variable, Score. For every 5 seconds the player survives, add 1 to the score. Display the final Score to the player on game over.
- Replay-button
If you add an Event Sheet in Layout 2, you can create a button to restart the game. Create a Sprite or Button object, and create an event with the condition “On clicked” and add the actions System > Reset global variables and System > “Go to Layout” > Layout 1.
- Additional behaviours
You can also add more behaviors, such as: “Solid” (the object becomes ‘solid’ so that other objects can’t pass through), “Bound to Layout” (the object cannot move outside the screen), “8-directions” (controllable by up/down/left/right keyboard buttons).
Find out more about behaviors at:
https://www.construct.net/en/make-games/manuals/construct-3/behavior-reference
- Make the spawning more random
Using the random-expression, see if you can make enemies appear more randomly.
Part 3: Saving and exporting the game
Now that your game is ready, let’s save it so we can share it with the world:
- We recommend first making a save of your project-file, the .c3p-file, just in case. Click Menu > Project > Save as > ‘Download a copy’ to make a local save on your computer. This .c3p file can then be opened again in the Construct 3 editor.
- Then, let’s make an export of the game:
- Go to Menu > Project > Export.
- Choose Web (HTML5). This format will run in-browser when hosted, and is available in the free version of Construct 3.
- Click Next, then Next.
- Remember to download the ZIP-file of your game!
What’s next?
In the next tutorial, you will continue your game-making journey by learning how to use our sample games and art assets:
Do you want to animate your characters? Add sound, backgrounds and fancy effects to the game? See our tutorial on how to make your game look, sound and play better:
In order to play and share your game, you need to host it. Find out how in our tutorial: