To make your game’s sprites come alive, you can animate them. Construct 3 lets you either import your animations as individual frames or sprite sheets, or create the animations natively in the animations editor. The animations can then be called through code, to switch into when for example the character is walking.
Creating an animation
To create a new animation, simply right-click in the white area of the panel and choose New animation. If you want to make a new animation based on an already existing one, right-click it and choose Duplicate.
The timeline
In the timeline you can see each frame of the current animation. By default, the animations consist of a single frame, starting from frame number 0 (not 1!). To add additional frames, right-click next to an existing frame and choose New frame or Duplicate last. Click a frame in the timeline to make it active.
If you need to reorder frames, simply drag and drop. If you want to reverse the order of the frames, right-click in the timeline and choose Reverse frames.
Draw your own animation
In the animations editor, you can draw your own animations frame by frame. Simply use the tools available. For a faster pipeline, draw your keyframes first, and then duplicate them and make modifications.
Importing animation
Start by creating an empty sprite. Then, click next to the empty default frame in the timeline (frame 0) and choose Import frames.
If you have your animation as individual numbered frame images (transparent background PNG-files), choose Import Frames > From files, select all the frame images, and choose Import.
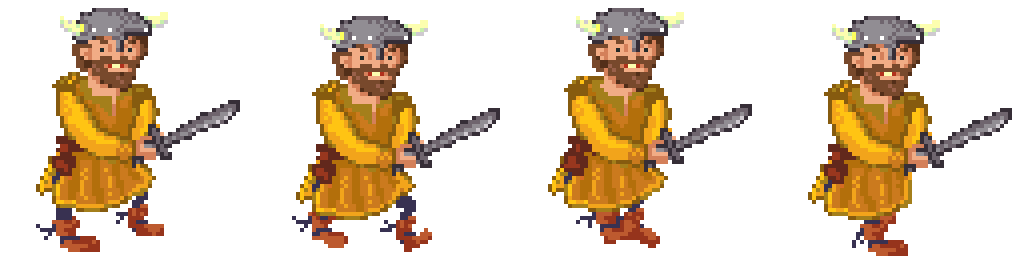
If you have your animation as a spritesheet – a single image with all frames – choose Import Frames > From Strip. A window appears for splicing settings. Check “Replace entire animation” to remove the first empty frame.
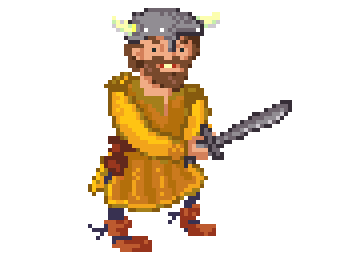
Step-by-step example: Viking Animation
To introduce you to importing animations in Construct 3, you can go ahead and download these two sprite sheets:

Step 1: Create a sprite
Create a Sprite in your project and rename it in the property panel as“Viking”. Then open the animation editor and change the name of the “Animation 1” to “VikingWalking” . In the timeline and right-click next to frame 0. Choose Import Frames > From Strip.
Step 2: Import the walking animation
Find the file you downloaded on your computer and press import. A window appears for splicing settings. Check “Replace entire animation” to remove the first empty frame, and write or choose the following:
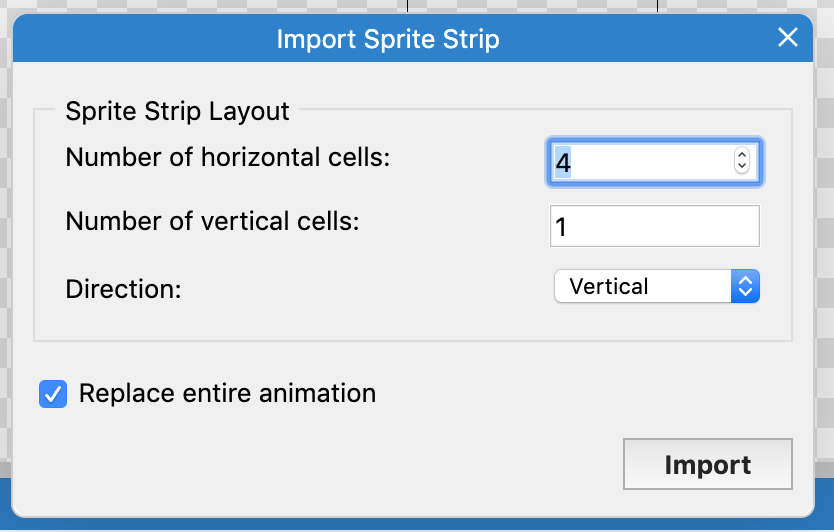
Number of horizontal cells: 4
Number of vertical cells: 1
Direction: Vertical
Check “Replace entire animation”
Press Import
Step 3: Make it loop
Next, in the Properties-panel, check “Loop” and adjust the speed to your liking. You can preview the animation from the Preview-button in the top-left part of the Animations editor.
Step 4: Create another animation
In the Animations-panel, right-click in the empty space and choose Add Animation to create another animation. Let’s name this animation as “VikingAttack”. Keep it activated, and go into the new timeline. Right-click next to frame 0, and choose Import Frames > From Strip.
Then repeat step 2, except in this case write 6 in “Number of horizontal cells.
Since this “VikingAttack” animation is for a specific purpose, it doesn’t make sense to loop it. If you want to make the animation pack a little more punch, drag the first frame last in the sequence.
Step 5: Switching between animations
To switch between animations, you need an event that triggers the switch. Let’s assume the Viking we created will be walking by default, and needs to switch to the Attack-animation when the spacebar is pressed.
Make sure that the first animation is named VikingWalking, and the attack animation is VikingAttack.
- Note: You first need to add an input object in your Layout in order for this to work. Right-click in your layout, choose Insert New Object > Keyboard.
Let’s go into the Event sheet and create the code needed:
- Add Event > Keyboard > On key pressed > press Choose and then press the Spacebar > Done
- Add action >Sprite > Set animation. Type in “VikingAttack”.
- Then we need to let the animation play. If you chose the default speed 5 (5 frames per second), each frame takes 0.2 seconds to complete. This animation has 6 frames, and thus takes 1.2 seconds to complete.
- Add action > System > Wait > 1.2 seconds.
- Finally we need to switch back to the walking animation. Add action > Sprite > Set animation. Type in “VikingWalking”.

Action 1: Sprite > Set animation to “VikingAttack” (play from beginning)
Action 2: System > Wait 1.2 seconds
Action 3: Sprite > Set animation to “VikingWalking” (play from beginning)
Now, when you play your game, whenever you hit space bar the viking attacks!
In the next tutorial, we’ll take a look at how to use tiled background objects into Construct 3:
Return to Tutorial 3 starting page: https://playableconcepts.aalto.fi/tutorials/tutorial-3/