Introduction
In this tutorial, you will learn in a step-by-step manner how to download and mod the example games available in our Game Library. You will learn how to navigate the game project file, how to load it into Construct 3 and how to make changes on your own.
Before we start, we recommend you start by going over Tutorial 1, to first learn how Construct 3 works.
Modding, or modifying, is a very fast and scaffolded way to learn about game creation and game design through making modifications to an existing game. Many commercial games, such as The Sims, Minecraft and Elder Scrolls: Skyrim, have thriving mod communities, letting players explore alternate versions of the game.
Note: This tutorial was made using Construct 3, r189.2, in April 2020.
License
All Playable Concepts materials (including assets and these tutorials) follow the Creative Commons Attribution 3.0 license, to the extent of the Construct 3 license. This means you are allowed to use the materials we provide, also commercially, as long as you credit Playable Concepts and/or the author of the material, but in the case of the C3P-files (Construct 3 files) only to the extent provided by Scirra Ltd, developers of Construct 3. Read the Terms and Conditions of Construct 3 for more information: https://www.construct.net/en/terms-and-conditions
How to credit?
Add the following line to your credits:
Based on materials made available by Playable Concepts, https://playableconcepts.aalto.fi/
Released under CC-BY-3.0 https://creativecommons.org/licenses/by/3.0/
Credit can be given in either a Credits-screen in game, or where the game is made available to play (such as an itch.io-page, webpage or similar). You can also credit at the end of a presentation.
You may embed the links and abbreviate the credit into the form of:
Based on materials by Playable Concepts at Aalto University
Released under CC-BY-3.0
If you use our art assets outside games, please credit with the name of the creator in conjunction to the asset. If you have additional questions or requests regarding the reuse of the art assets, please contact Solip Park (nasolip at gmail.com) or Christina Lassheikki (christina.lassheikki at gmail.com).
How to download the sample games
Start by visiting our Example Game library. In the library, we have collected an assortment of tiny games and their project files for Construct 3, complete with comments.
- Click on a game that looks interesting to you, and try it out on itch.io – you can play the game for free, in-browser.
- Once you have chosen a game that you want to start working from, click the Download-button to save the ZIP-file archive to your computer.
- Extract the ZIP archive into a folder on your computer.
For more instructions on extracting ZIP-archives, visit for example: https://support.microsoft.com/en-us/help/4028088/windows-zip-and-unzip-files for Windows and https://support.apple.com/guide/mac-help/compress-uncompress-files-folders-mac-mchlp2528/mac on Mac - The archive contains the game as a .c3p-file (Construct 3 project file), the game as an HTML5-build, and screenshots of the game. For modding, you will need the .c3p-file only.
Go ahead and download a game example! In this tutorial, we will show you how to work with the game example ‘Burn Out’ – but you can choose whichever you like:
How to open a sample game in Construct 3
Next you will learn to open a .c3p-file – a game project file – in Construct 3. Go to https://editor.construct.net/ and launch the Construct 3 game making tool. Note: We recommend you use the Google Chrome browser, as the Construct 3 tool works better in Chrome than Firefox as of April 2020.
Instead of creating a new project, press the File-button on the landing page:

Then find the downloaded .c3p-file on your computer and press Open:
Start modding
Step 1: Get to know the game you’re about to mod
Let’s start by trying out the game! Hit the play-button to preview (test) the game:
Throughout this tutorial, whenever you make a change, go ahead and test the game by pressing the play-button. That way you’ll instantly see what change caused a problem – or something interesting to happen. If everything is working as it should, think about what would be interesting changes you’d like to make to the game.
- Remember, you can always hit CTRL+Z if something goes wrong.
- We recommend making saves during the process, just in case. Click Menu > Project > Save as > ‘Download a copy’ to make a local save on your computer. You can then load that file in just like you loaded in the game example in this tutorial.
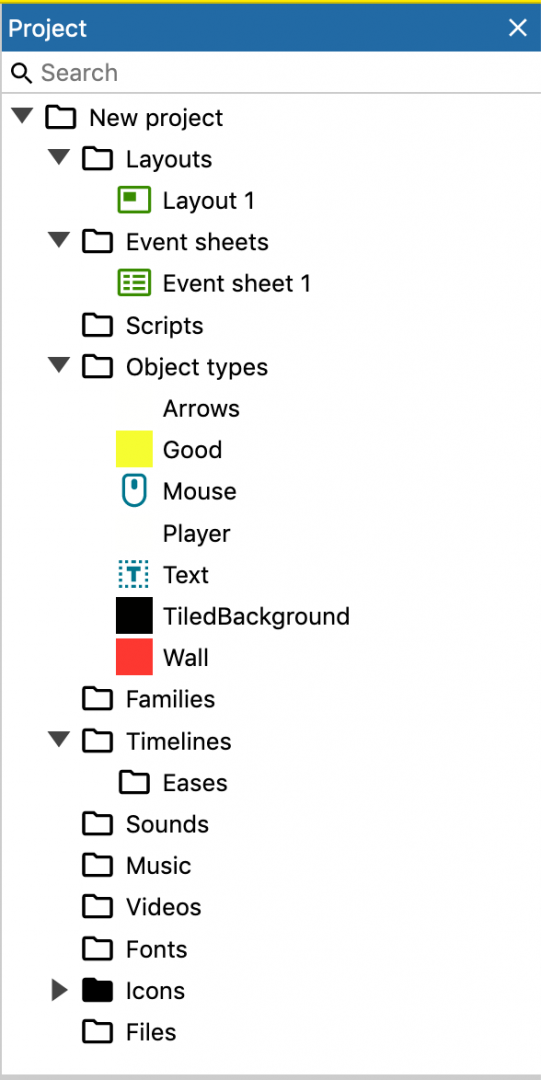
First, take a look at the Project hierarchy, and the Layout to identify what the game contains. Please note: These will contain different things depending on which game you chose.
In the Project panel, first look at how many Layouts and Event sheets the game contains. Then look at the different object types in the game – in this case Arrows, Good, Mouse, Player, Text, TiledBackground and Wall. These are going to be referred to in the Event sheet as well:
In the Layout area, you can click on objects to see their Properties in the Properties panel. Familiarise yourself with the objects:
Step 2: Check the behaviours of objects in the game
Behaviours are the ready-made scripts that can be attached to objects in Construct 3. They are code that doesn’t show up in the event sheet. So to see what behaviours are attached to objects, choose the object in the Layout or the Project-panel, and then scroll down in the Properties panel to investigate the Behaviours:
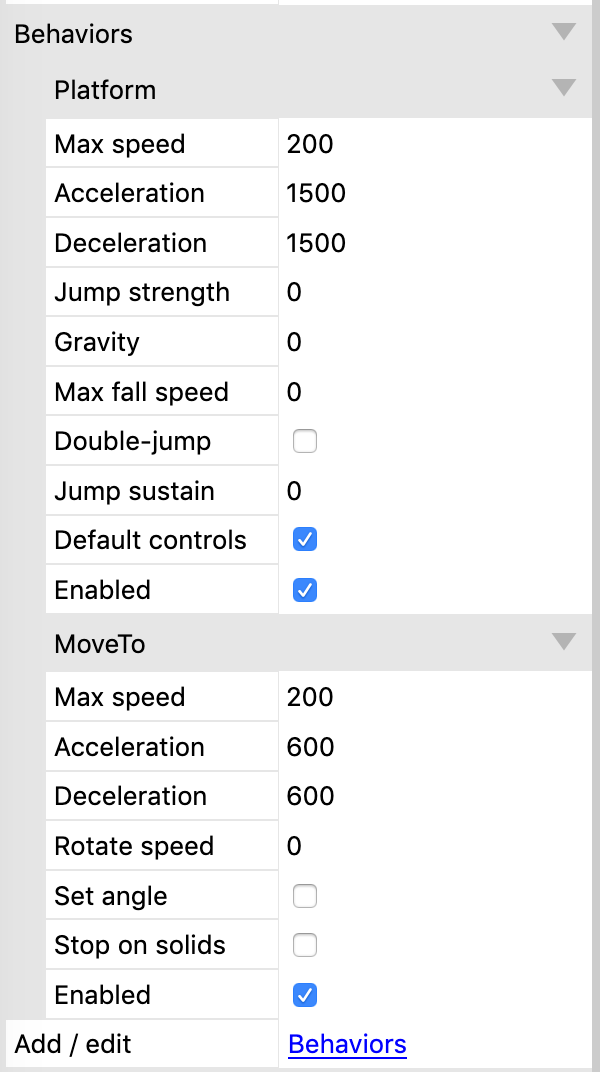
This particular object has the behaviours “Platform” and “MoveTo”. Both have different value fields, such as Max speed, Acceleration, Deceleration, and some toggles, such as Double-jump, Set angle and Enabled.
Please note: Depending on the game you chose, some objects may not have any Behaviours attached to them.
- If the toggle Enabled is not ticked, the behaviour is switched off. This can be useful for testing.
- You can edit any number value in the behaviour by clicking it and typing in a new value, then press enter.
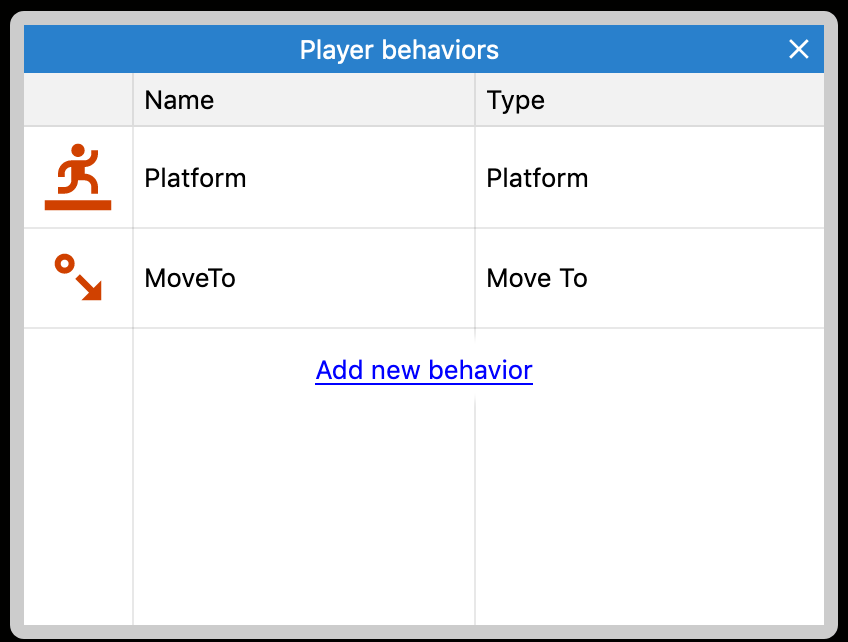
If you want to remove or add behaviours, go ahead and click the blue link Behaviours at the bottom of that panel:
- Right-click and choose “Delete” to remove a behaviour.
- Press “Add new behaviour” to add more behaviours.
Step 3: Reading and editing the Event Sheet
Next, let’s head to the Event Sheet to take a look at the code of the game to get an understanding of what’s going on.
At the top of the Event Sheet, you will see all Global Variables in the game and their initial values. To edit these initial values, simply double-click to open the variable and change the field ‘Initial value’:

Below, you will see the actual events. On the left, you see the Condition(s) that will trigger the event, and on the right, the Action(s) the event sets in motion:

Events are read from top to bottom, and actions happen in that order. In yellow, you see our Comments to the event. The comment is a simple explanation of what the event does.
In this event, the game System makes 1) the Player object move toward the position of Mouse.X, Mouse.Y – the on-screen location of the mouse cursor – and then 2) sets the Text-object’s text to display the global variable Points. The condition – Every tick – means the System will do these two events constantly in real-time.
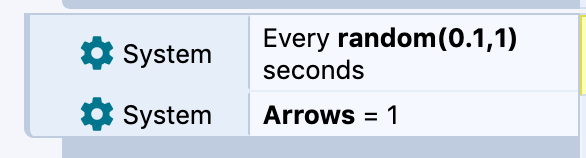
Sometimes an event needs more than one condition. In this case, both conditions have to be met to trigger the Action(s). This event is triggered at random intervals between 0.1 and 1 seconds, but only when the variable Arrows also equals 1:
To add conditions, right-click (Mac: ctrl+click) on the darker grey area below the event conditions and press Add > Add another Condition.
- To remove conditions, simply choose it by clicking it, and then hit backspace, or right-click to select ‘Delete’ in the drop-down menu.
Take some time to familiarise yourself with the events in the game.
- What do the events of the game do? What do the values affect?
- If you run into events you don’t understand despite the comments, try disabling the event by right-clicking in the grey area under the event conditions and choose Toggle > Toggle disabled.
- Then test the game. What happened?
- To re-enable the event, right-click in the grey space under the event conditions and again choose Toggle > Toggle disabled.
If you want to change the events or actions, or the values used in them, simply double-click the event to open it. If you make changes, save them by pressing Done or abandon them by pressing Cancel.
Go ahead, make some changes! You can add events, layouts, objects and actions to the game like normal. Remember to test the game often!
Step 4: Switching out graphics
You’ve made some changes to the game, but it looks the same still. Let’s change the graphics next!
We have made some free 2D art assets for you to play around with and create your own games. You can use images you have on your own computer, or then use the PlayCo Dragon and the candy from tutorial 1:


Go ahead and download the images. Next we will put them into the game:
- Navigate to the Project panel.
- Double-click the Player-object under Object Types.
- The Animations editor opens.
- Click the folder icon at the top of the screen, and open the PlayCo-dragon graphic from your computer.
- Close the Animations Editor.
Repeat the same steps for any other graphics you wish to switch out.
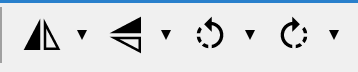
Adjust the size of the new objects by dragging the corners or changing the Size property in the Properties-panel. If you need to rotate the graphics, you can do it in the Animations editor:
If you want, you can change the background as well, and try out particle systems (more on particles in the official Construct 3 documentation):
https://www.construct.net/en/make-games/manuals/construct-3/plugin-reference/particles
Once you’re done, you might end up with something like this:
What next?
Congratulations, now you know how to mod games!
In the next tutorial, we will go more in-depth into how you can add animations, sound and gameplay features into your game: Tutorial 3: Making your game look, play and sound good.
After you have developed your game, you can go ahead and save it and export it. Check out our tutorial on how to share and embed your game: Tutorial 4: Sharing, publishing and embedding your Construct 3 game.